Table of Contents
1. Historical Roots of Butter Churner
Early Origin:
The history of making butter through Butter Churner dates back thousands of years, possibly originating in ancient cultures where the domestication of dairy animals such as cows, goats and sheep was prevalent.
The earliest evidence of butter production can be found in what is now modern Turkey and Iran around 2000 BC. Archaeological discoveries show that early civilizations were familiar with the process of churning cream.
Nomadic and pastoral societies:
Nomadic and pastoral societies depended heavily on dairy products for sustenance. Butter, being a concentrated source of energy and nutrients, became an important component of their diet.
These societies developed specialized containers and techniques for churning butter, often using materials such as animal skins or wooden utensils to stir the cream.
Ancient Egypt and Mesopotamia:
Butter making was well established in ancient Egypt and Mesopotamia. Both areas had advanced farming practices and developed methods of dairy processing.
In ancient Egypt, butter was not only a staple of the diet, but also played a role in religious ceremonies and offerings to the gods.
Medieval Europe:
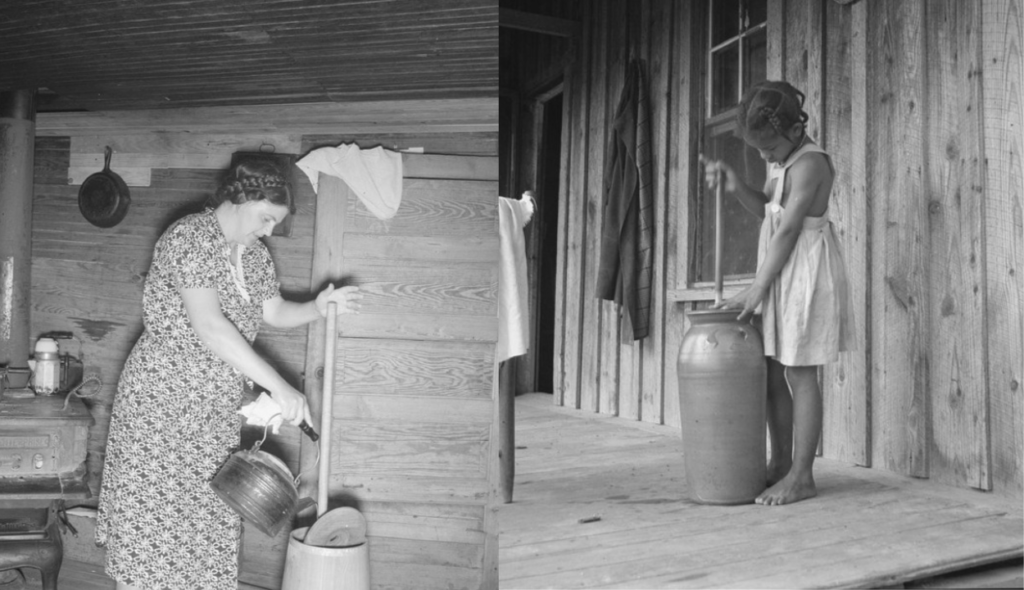
Butter churning remained a fundamental practice in medieval Europe. Monasteries and estates with dairy herds were at the center of butter production.
Churns evolved from simple containers to more sophisticated, hand-cranked devices, reflecting advances in craftsmanship.
Industrial Revolution:
With the beginning of the Industrial Revolution in the 18th century, butter production saw significant changes. Mechanized churning, often powered by water or steam, revolutionized the scale and efficiency of butter making.
This period saw a transition from individual households producing butter for personal use to large-scale production for commercial purposes.
Modernization and Commercialization:
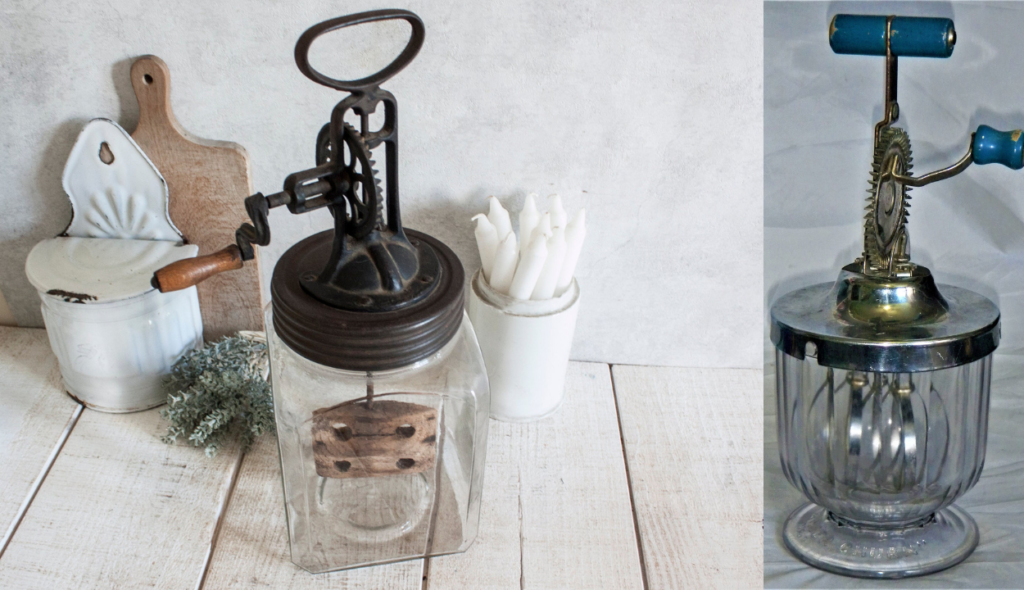
In the late 19th and early 20th centuries, technological innovations led to the development of electric and motorized churning, making the process even more streamlined.
The commercial dairy industry emerged and butter became a widely available commodity in markets around the world.
Contemporary Practices:
While modern butter production often involves industrial-scale processes, there has been a resurgence of interest in traditional, artisanal butter making. Many small-scale producers and enthusiasts adopt legacy techniques and equipment.
2. Preparing the Cream
Steps for Preparing Cream for Churning
- Selection of quality cream:
Start with fresh, high-quality cream. For optimal butter production it is necessary to use cream with a high fat content. Heavy cream or whipping cream is generally preferred. - Letting the cream reach room temperature:
Before churning, leave the cream at room temperature for some time. This helps the cream cook slightly, allowing the fat globules to coalesce more efficiently during churning. - Avoiding ultra-pasteurized creams:
Ultra-pasteurized cream, a common type of cream found in supermarkets, has been heated at high temperatures to extend its shelf life. Although it is still possible to churn ultra-pasteurized cream, it may require more time and effort. - Checking for clots or clumps:
Inspect the cream for any clots or flakes. These can sometimes be caused by uneven pasteurization or temperature fluctuations. Remove any lumps before churning. - Adjusting the temperature if necessary:
Conversely, if it is too hot, it may be difficult to achieve the desired consistency. Adjust temperature as needed. - Avoiding overcooking:
While a little cooking of the cream is beneficial, overcooking can result in a tart flavor similar to sour cream. It is important to strike a balance to achieve the desired taste. - Optional: Adding culture (sour cream):
Some butter makers like to add a small amount of cultured buttermilk or sour cream to fresh cream. This introduces beneficial bacteria that can enhance flavor and aid in the churning process. - Optional: Salted or Unsalted Butter:
If you prefer salted butter, add a small amount of salt to the cream before churning. - Homogenization (optional):
Commercial creams are often homogenized, which breaks up the fat globules to ensure even distribution. If non-homogenized cream is used, the fat may separate, resulting in cream with a higher fat content.
3. : The Churning Process
The Churning Process: Transforming Cream into Butter
- Setup and Tools:
Start by setting up your butter churner. Make sure it is clean, well assembled and ready to use. Make sure you have securely fastened any attachments or pedals. - Pouring the Cream:
-Put the prepared cream in a churner. Make sure you don’t overfill it, as there needs to be enough room for the cream to move and thicken. - Starting the Brainstorming Process:
Start churning by turning the handle or activating the churner according to its specific mechanism. This motion agitates the cream, causing the fat globules to stick together. - Movement Phase:
As the churner operates, the cream is continuously stirred. This motion causes fat pellets to collide and stick together, forming larger fat clusters. - Emulsification:
During churning, the fat globules begin to break up and merge, forming an emulsion. This emulsion is a mixture of water, fat and air bubbles. - Visual Change:
As churning progresses, you will notice a change in the appearance of the cream. It will thicken first, becoming whipped cream, then turn into a grainy consistency. - Separating Butter and Buttermilk:
As churning continues, the fat clumps eventually separate from the buttermilk. The fat, now in solid form, is butter, while the remaining liquid is buttermilk. - Test for Completion:
To confirm that churning is complete, you can check for clear separation between the butter and buttermilk. The butter should form separate flakes. - Draining and Washing the Butter:
Take out the buttermilk from the churner, leave the butter in place. Rinse the butter in cold water to remove excess buttermilk, which can spoil. - Optional: Adding salt or flavor:
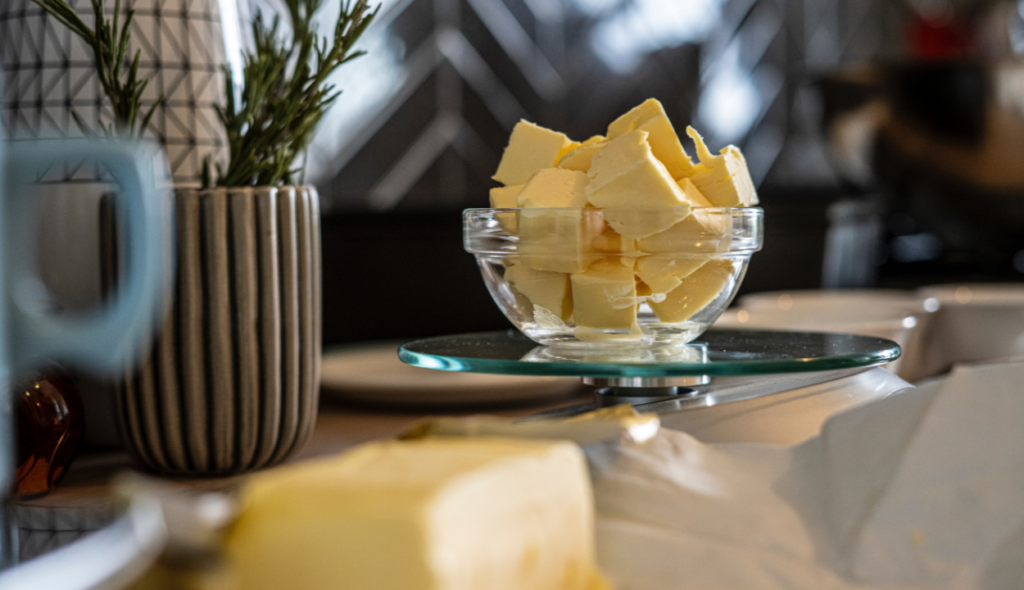
At this stage, you may choose to add salt or other flavorings to the butter. This step is completely optional and can enhance the flavor of the final product. - Shaping and Storage:
Give the butter the desired shape using a mold or simply pack it in a container. Keep freshly churned butter in the refrigerator. - Uses of buttermilk:
Leftover buttermilk can be collected and used in various culinary applications, such as in baking or as a base for beverages.
4. Culinary Creations with Homemade Butter
Creative Ideas for Using Homemade Butter in Cooking and Baking
- Simple Buttered Toast:
Encourage readers to experience the pure, creamy goodness of homemade butter by spreading it generously on warm, freshly toasted bread. - Flavored Mixed Butter:
Share recipes for making flavored compound butters by incorporating herbs, spices, garlic, or citrus zest. They can be used to enhance the flavor of meat, vegetables or pasta dishes. - Baking and Pastry:
Highlight how using homemade butter in baking can enhance the flavor and texture of cakes, cookies, pastries, and pie crusts. Mention its creamy richness and how it contributes to tender crumbs. - Whipped Butter for Fluffy Pancakes and Waffles:
Explain how whipping homemade butter with honey or maple syrup makes a delightful topping for pancakes and waffles, providing a sweet, savory treat. - Creamy Sauces and Gravies:
Describe how adding homemade butter to sauces and gravies can add a luxurious, velvety texture and a rich, buttery flavor to dishes such as pasta, roasted meats and vegetables. - Butter Based Caramel Sauce:
Provides a recipe for delicious caramel sauce made with homemade butter, brown sugar and cream. This versatile sauce can be drizzled on desserts, ice cream or used as a dip. - Herbed Butter for Roasting:
Suggest adding fresh herbs like rosemary, thyme or sage to homemade butter for fragrant, flavorful results and using it to baste meats and vegetables while roasting. - Butter-Brushed Grilled Corn:
Encourage readers to drizzle homemade butter on freshly roasted corn and sprinkle with their favorite spices or grated cheese for a mouth-watering side dish. - Buttery Mashed Potatoes:
Emphasize the difference in flavor and creaminess that homemade butter brings to mashed potatoes, making them a delicious side dish that’s perfect for special occasions. - Homemade Ghee:
Explain how readers can transform their homemade butter into clarified butter or ghee, prized for its high smoke point and nutty, aromatic flavor. - Sweet Butter Treats:
Share recipes for sweet treats like buttered shortbread cookies, buttercream frosting, or buttered toffee, and highlight how the quality of homemade butter enhances their flavor. - Butter Based Salad Dressing:
Provide recipes for creamy salad dressings made with homemade butter, which can provide salads with a velvety texture and rich flavor, enhancing their overall appeal. - Stuffed Butter Rolls:
Introduce a unique idea of making stuffed rolls by rolling the dough around cubes of homemade butter and baking until golden and flaky. - DIY Popcorn Toppings:
Suggest melting homemade butter and drizzling it over fresh popcorn, then sprinkling with various seasonings or grated cheese for a customizable snack. - Refreshing Drink with Butter Coffee:
Introduce the concept of Bulletproof Coffee, a popular trend where homemade butter is added to coffee, creating a creamy, frothy beverage with sustained energy benefits.
5. Practical Tips for Success in Butter Making
- Start with a quality cream:
Start with fresh, high-quality cream. Look for cream with a higher fat content, as this will result in a creamier and more flavorful butter. - Let the cream cook:
Let the cream rest at room temperature for a while before churning. This mild cooking process helps the fat globules to coalesce more effectively. - Avoid overfilling the churner:
Do not fill the churner more than necessary. Leave enough space for the cream to move around and stir properly. - Monitor the Temperature:
It should be slightly cool but not too cold, as too cold cream may take longer to churn. - Be patient:
Making butter requires patience. The churning process can take some time, and it is important to keep churning until the cream separates into Butter Churner and buttermilk. - Check progress regularly:
Stop periodically and check the churner for progress. Look for visual cues such as changes in texture and consistency. - Adjust Churning Speed:
If using a handheld whisk, adjust the speed to a comfortable and consistent motion. This helps in maintaining a constant churning speed. - Avoid over-churning:
Take care not to churn the cream too much. Over-churning can cause the butter to become too tough and result in a less desirable texture. - Strain the buttermilk thoroughly:
After churning is complete, make sure to remove the buttermilk from the churner as thoroughly as possible. Butter can spoil quickly due to excess buttermilk. - Wash and shape the butter:
Rinse the freshly churned butter with cold water to remove any remaining buttermilk. Shape it into a block or mold it into the desired shape. - Store Properly:
Store butter in an airtight container in the refrigerator to maintain freshness. Alternatively, you can also freeze butter for long-term storage. - Experiment with flavours:
Don’t be afraid to experiment with different flavors. Herbs, spices or even oil can be added to create unique and delicious butter variations. - Keep equipment clean:
Clean and maintain your butter churner properly to ensure it remains in good condition for future use. - Learn from Experience:
Each batch of butter may have unique characteristics. Take notes on what worked well and what adjustments you made for future reference. - Embrace the art of butter making:
Remember that making butter is as much an art as it is a science. Enjoy the process and take pride in making your own delicious, homemade Butter Churner.
Insightful piece